
Painting Tyranid Armor
Finally here is the tutorial on painting Carapace that quite a few of you have been asking for, Enjoy.
Colors used:
Feel free to use other colors to make your carapace, or even substitute a whole other color range in to make, say… blue Carapace.
A- Scorched Brown (Games Workshop)
B- Bestial Brown (GW)
C- Golden Brown (Delta Ceramcoat- the large paints you can get a Michaels Craft Stores)
D- Flesh (Coat d'arms paints)
E- Oyster White (Delta Ceramcoat)
F- White (Vallejo Paints)
-There is no reason I chose one manufacture of another, it is just what I had. I did use color "D" though because the GW Bleached Bone has too much yellow in it for me.
-Also for all of these steps I use Floating Medium by Plaid (it is a clear blending medium used to thin down paints, MUCH better than water). See the little caption at the top of the painting steps picture. Color 1 and 2 are the two colors that I am mixing. Color 3 is the blending medium that I am mixing in to the two paints that I mixed to keep them smooth. This way I can put multiple layers of paint on a miniature without getting that chalky paint build up look.
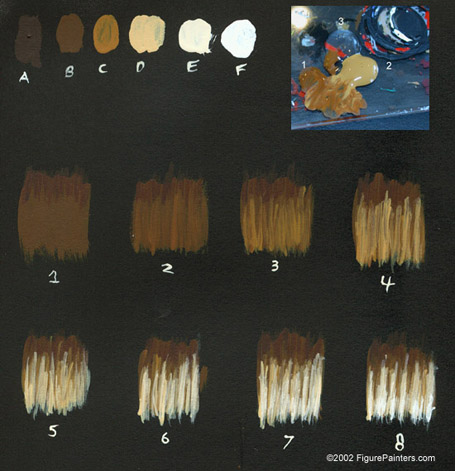
Step 0- Prime the Mini black
Step 1- Paint Mini with two thin coats of "B". Where the plates of the armor join put down small streaks of "A" that have been thinned down.
Step 2- Mix colors "B" and "C" (50/50 -Same technique as seen in the mixing caption). Lay the paint down in triangular patterns as seen in Example 2. They may overlap.

Step 3- Lay down a thinned "C" in the same triangular pattern. Don't take this color up as far as you did in step 2. Also make the "triangles" thinner than in step 2 too.
Step 4- Mix colors "C" and "D" and add the thinning medium (again the thinning medium is present in all steps. You should be tinning it down to a soupy mix.
Step 5- Now apply a thinned "D" in smaller triangles than Step 4.
Step 6- Mix colors "D" and "E" and thin and apply in smaller "Triangles" that don't go up as far.
Step 7- Apply a thinned "E" in very small streaks than maybe only go 1/3 of the way up.
Step 8- Apply a thinned "F" just to the very edge of the armor.
Step 9- Go take and Aspirin.
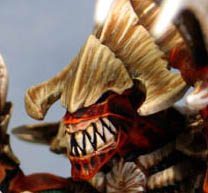
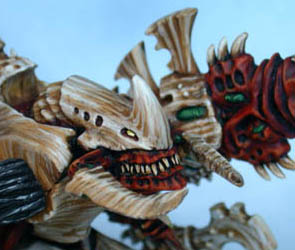
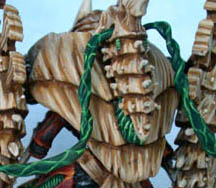
Here are a few examples of complete Carapace.