
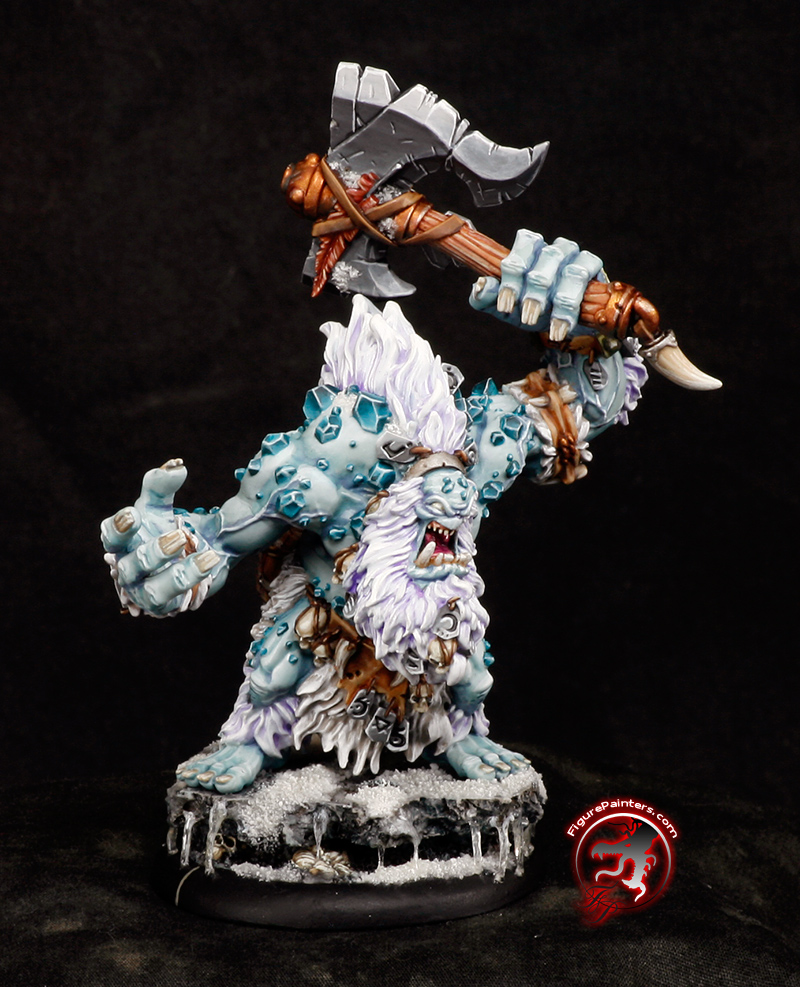
Making snow and icicles for miniatures
Looking around at the different tutorials out there for snow I was not able to find one that gave me the volumetric look I wanted, staying nice and white all while being super tough for models that will be on the table top to be played with.
After some experimentation this is what I came up with. It is not the best looking snow effect out there, but as they get more powdery/fluffy they seam to break down easier.
Making icicles always looked so involved too. So here is a pretty simple way to make them in a few steps.
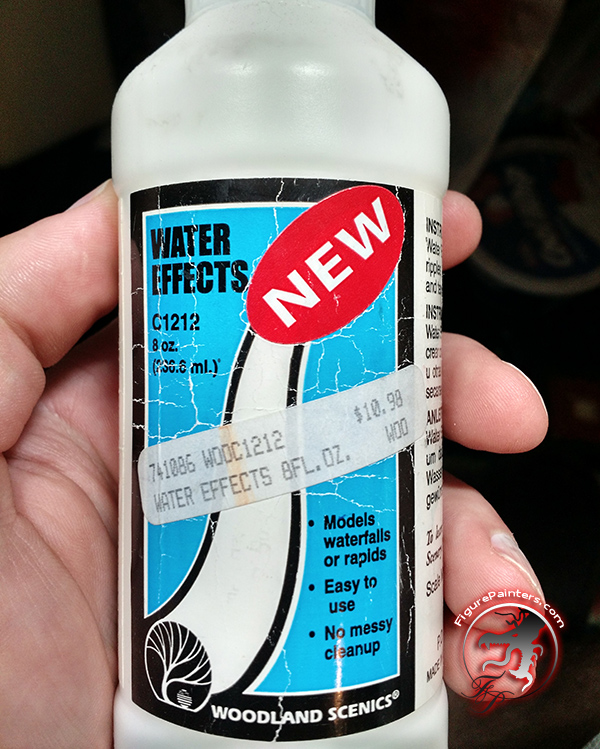
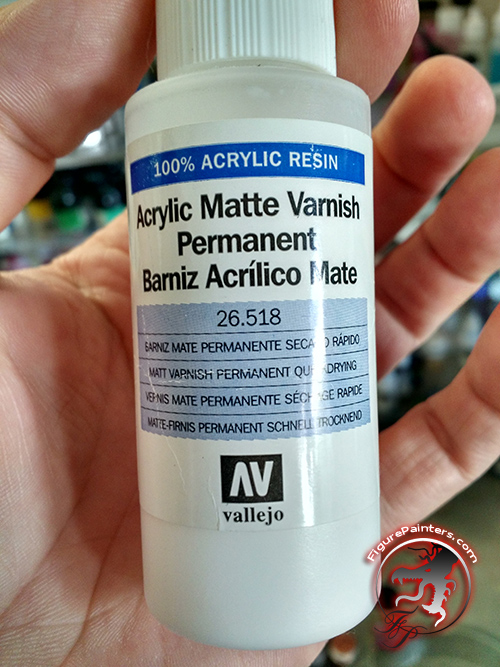
Materials you will need: (Pictures after list)
1. Baking soda (from your local market baking section)
2. Woodland scenics water effects
3. Vallejo Water Texture
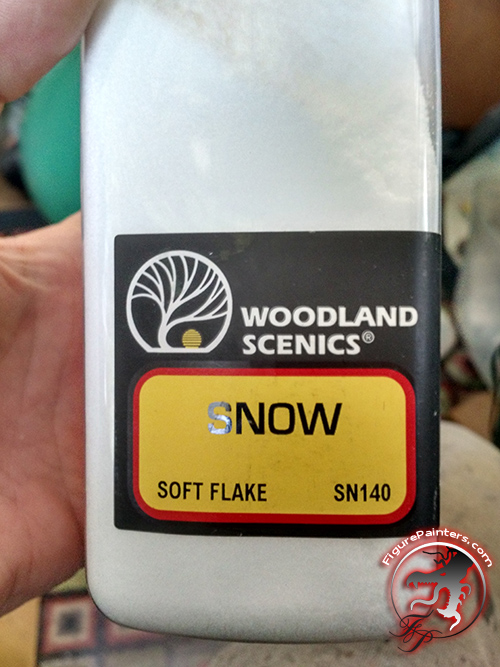
4. Woodland Scenics Snow
5. Acrlic Matte Varnish (airbrushable)
6. Clear fishing line. I used 30lb test.
7. Airbrush

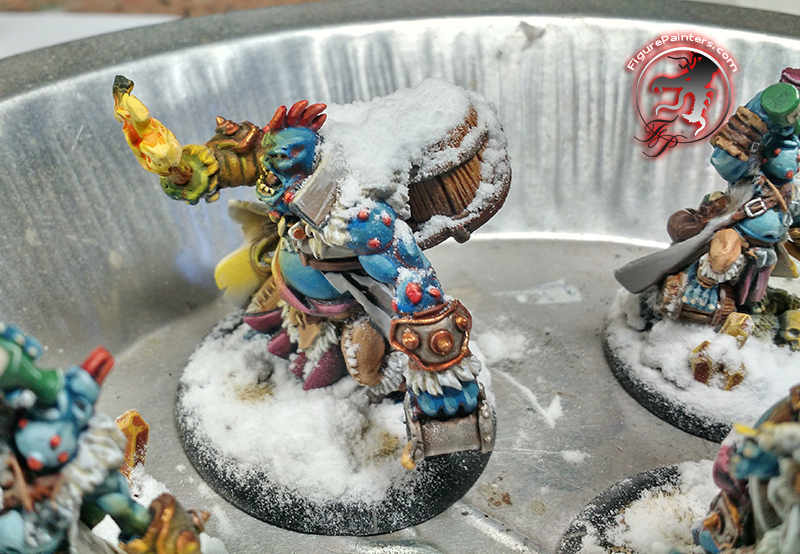
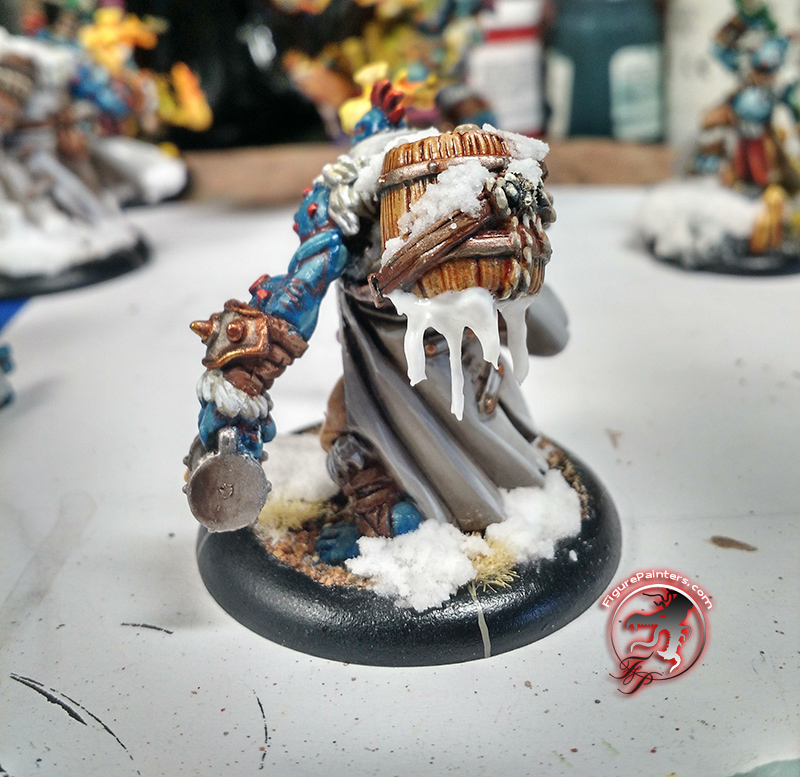
First up is how to make Icicles. This is pretty easy.
Take some fishing line and cut a small piece off. Have a little pool of gel super glue off to the sise, I pinched the fishing line between some twezers and dip one end into it and then attach it to the model.
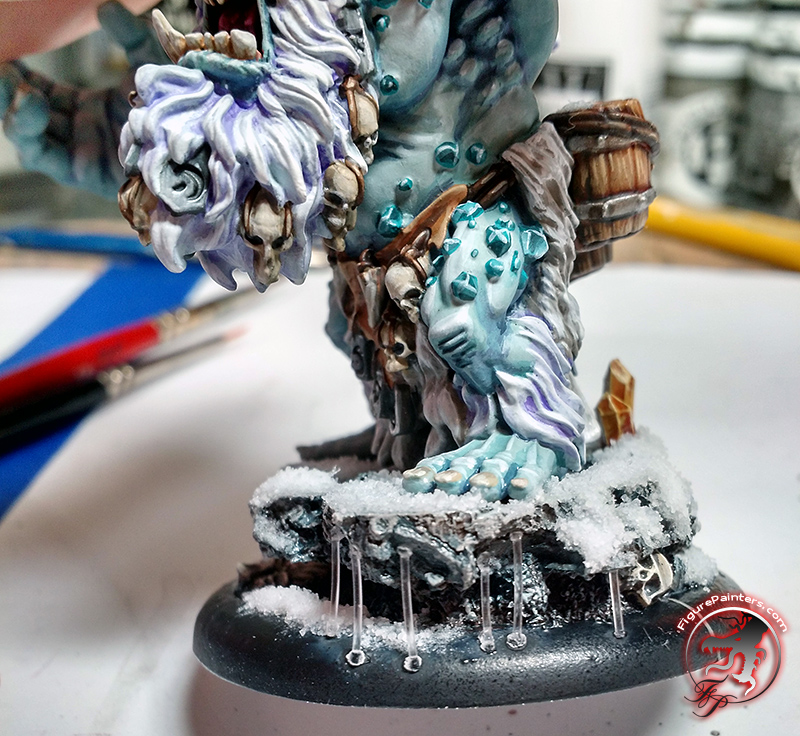
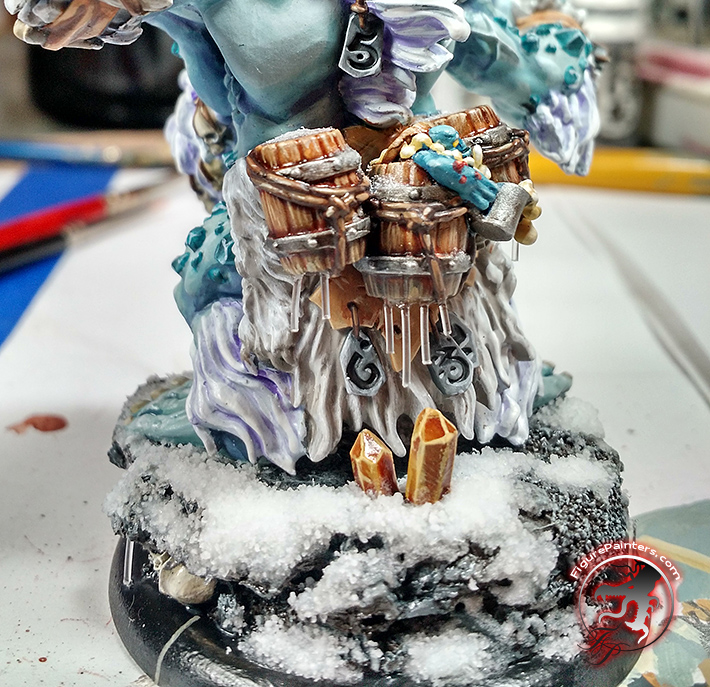
Once that has dried, grab the bottle of water effects. This has a squeeze bottle which i just took off to open the bottle and scooped some of the paste out. Using a toothpick spread the water effects out on the finish line to make icicle looking shapes.
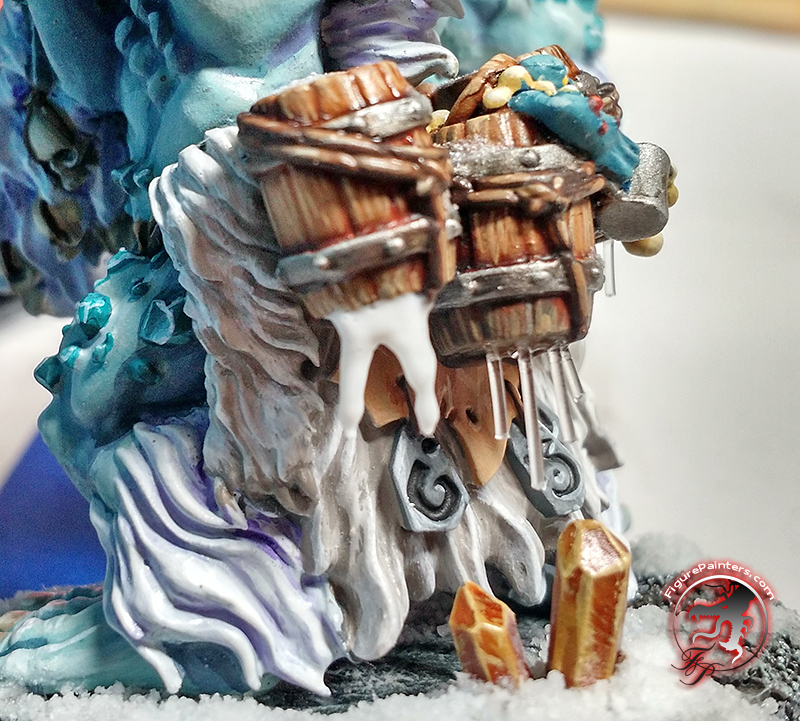

Usually let it sit overnight to dry all the way. If needed build up some more paste to make them more icicle like or to add more volume to them. Once all that is dried use a little bit of thinned white paint to cloud them up a little. Normally icicles are a little clouded, and this will also help them be more visible on your model. A perfectly clear icicle will be hard to see on a model from any distance away.


Now on to the snow.
There are a few steps here. There is no super easy method for making snow that look chunky, fluffy and some what smooth.
Here are some of the other examples that I have tried.
Here with using wall spackle plaster and glue as a liquid. It makes a nice smooth white mass of "snow" that is rock hard.

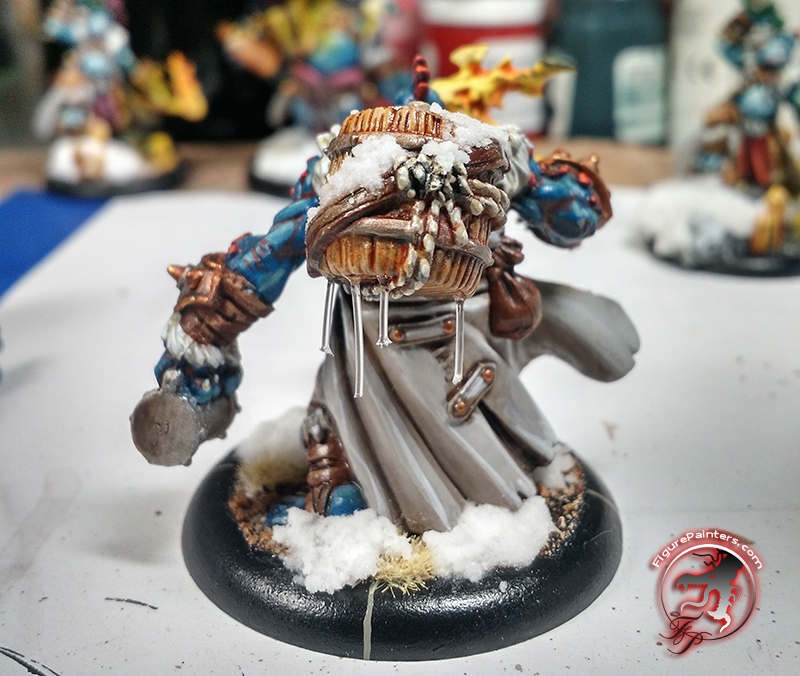
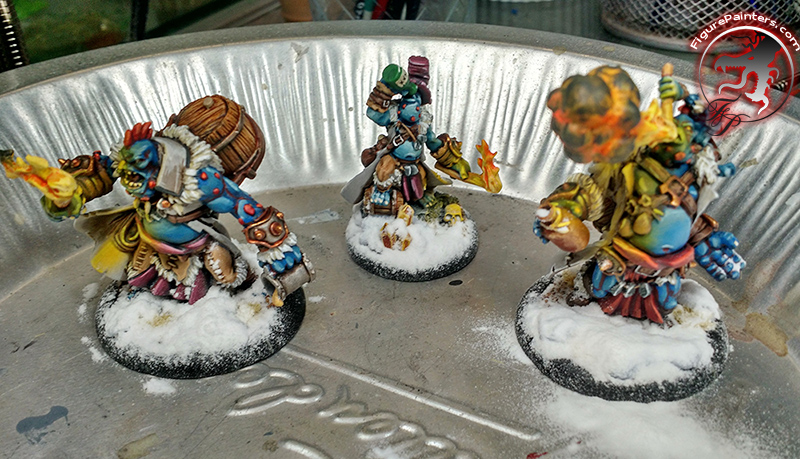
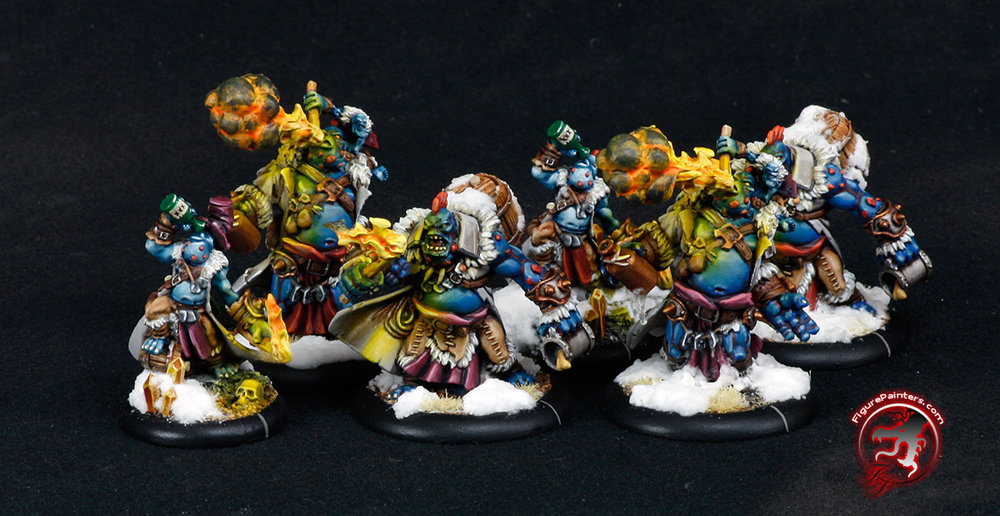
This one is just using Woodland Scenics snow with a little bit of white dry brush after. It looks ok, but it has a little too much of a rough texture for snow. I am probably going to cover it up with the way I did it on my fire eaters.
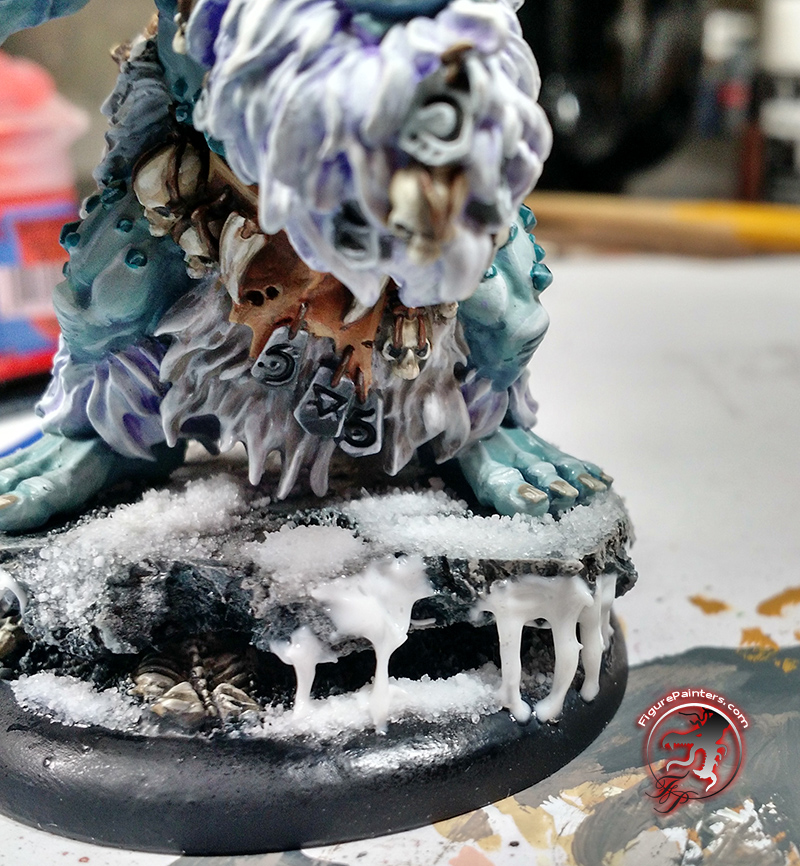
Now the steps for creating somewhat realistic tough snow for table top minis.
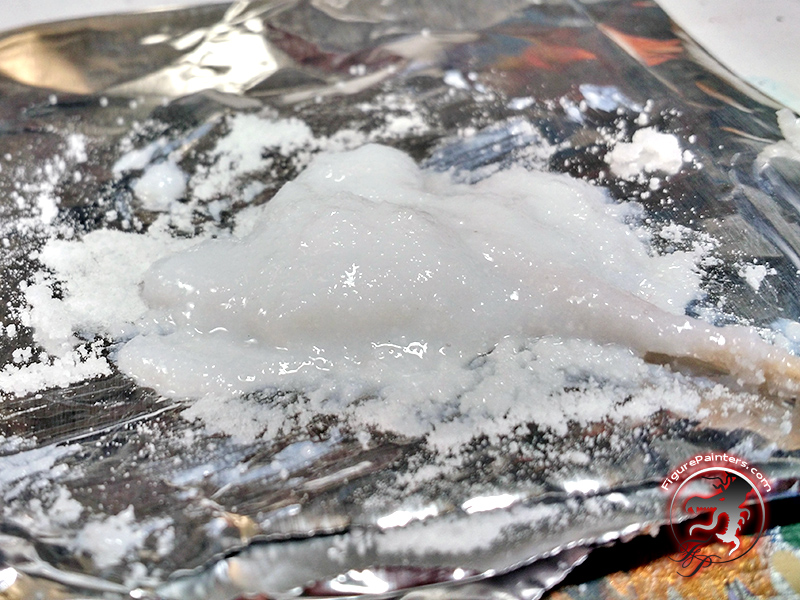
Grab some foil (or something to mix on), toothpicks (or anything to mix and apply with), Vallejo Water Texture, Woodland scenics snow and baking soda.
I mixed about 50/50 baking soda and woodland scenics snow together into a small container. Then take a scoop of water texture and place it onto your mixing surface. Now pour your dry snow mixture onto it and start mixing it until you get a thick wet slurry consistency.
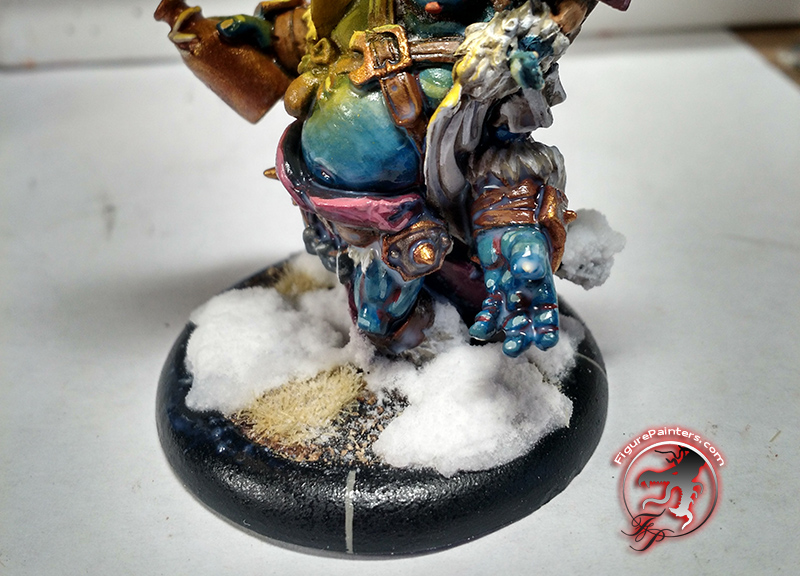
Then using a toothpick or small spatula spread it around the base and the model where you want it. Once that is done take just straight Baking soda and cover the areas of snow on the mini. This will help smooth out the snow heaps and add some of that natural powdery look of snow. This will look like they have been through a snow storm and have this cool looking snow on them. But it will not stay at all for a mini that will be played with. So we are going to have to get rid of some of it and seal in the rest.
I let it sit overnight for the mixture to dry all the way. Using a large'ish brush (I use a large watercolor brush), brush off some of the excess baking soda. What you are looking for it to get rid of the baking soda the base edge and the mini where you don't want the dusting of powder.
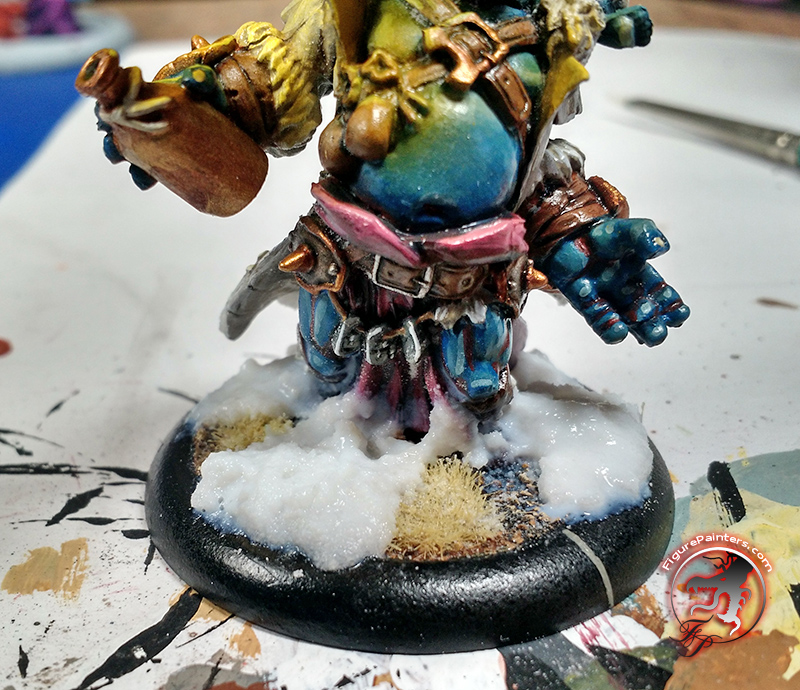
Now there should still be a decent amount ow powdery baking soda on the snow. You want to start the sealing process for it now.
Take the Acrylic Matte Varnish and load up your airbrush. Turn the PSI down to 5 or less. You want just the minimum amount of air pressure to sputter out some of the varnish onto the snow. Anything more will start blowing away the baking soda "snow".
I sprayed it on pretty heavy and you can see it pooling on the mini in place. Just take an older paint brush and wick out the extra varnish out of the cracks. Your mini will end up a little shiny, but that is nothing a little dull coat won't fix later. Let the varnish dry mostly before the next steps. The baking soda will still be loose, but this will help it stay put for the next step.
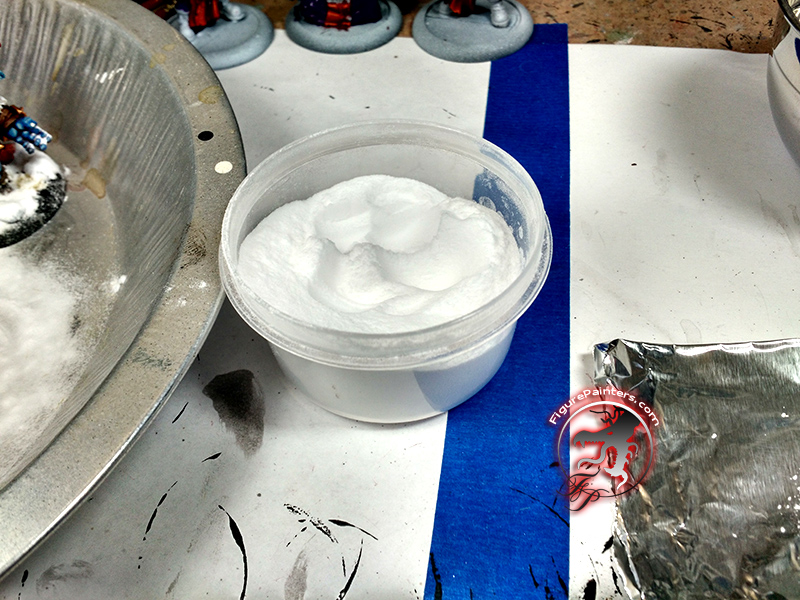
Now take the varnish and pour some out into our egg pallet. Take an old brush and start dabbing varnish onto the piles of snow. You will want to get is nice and saturated with varnish.
Set it aside to let it dry. Once it id done drying you can clear coat the mini as normal to get rid of the shine.

And once they are clear coated with a matt varnish then a dull coat.
Good luck! And if you have any questions please let me know.